

Remember the drum pendant I got for my birthday?


Oh, and here's a close-up of the sadness that stuck around for too long in our dining room. Do you see what I'm talking about? Kind of dated, right? It looked even worse in person.

Back to the replacement.... I was set on the idea of installing this thing ourselves, so I did some Googling and found a great tutorial on This Old House. (Instructions - check).
So we unpacked all the pieces of the pendant and struggled through some really terrible assembly instructions for about an hour. In an effort to keep up the optimism and momentum, I tried different approaches. "I'm going to read them out loud like it's a story!" "Let's pretend there are no written instructions and see if we can put it together based on the picture. It's like a puzzle! Fun! Yeah!" Eventually, somehow, we managed to assemble something that resembled a real-life lighting fixture. But it wasn't easy. ***Pssst... See my update at the bottom of the post.
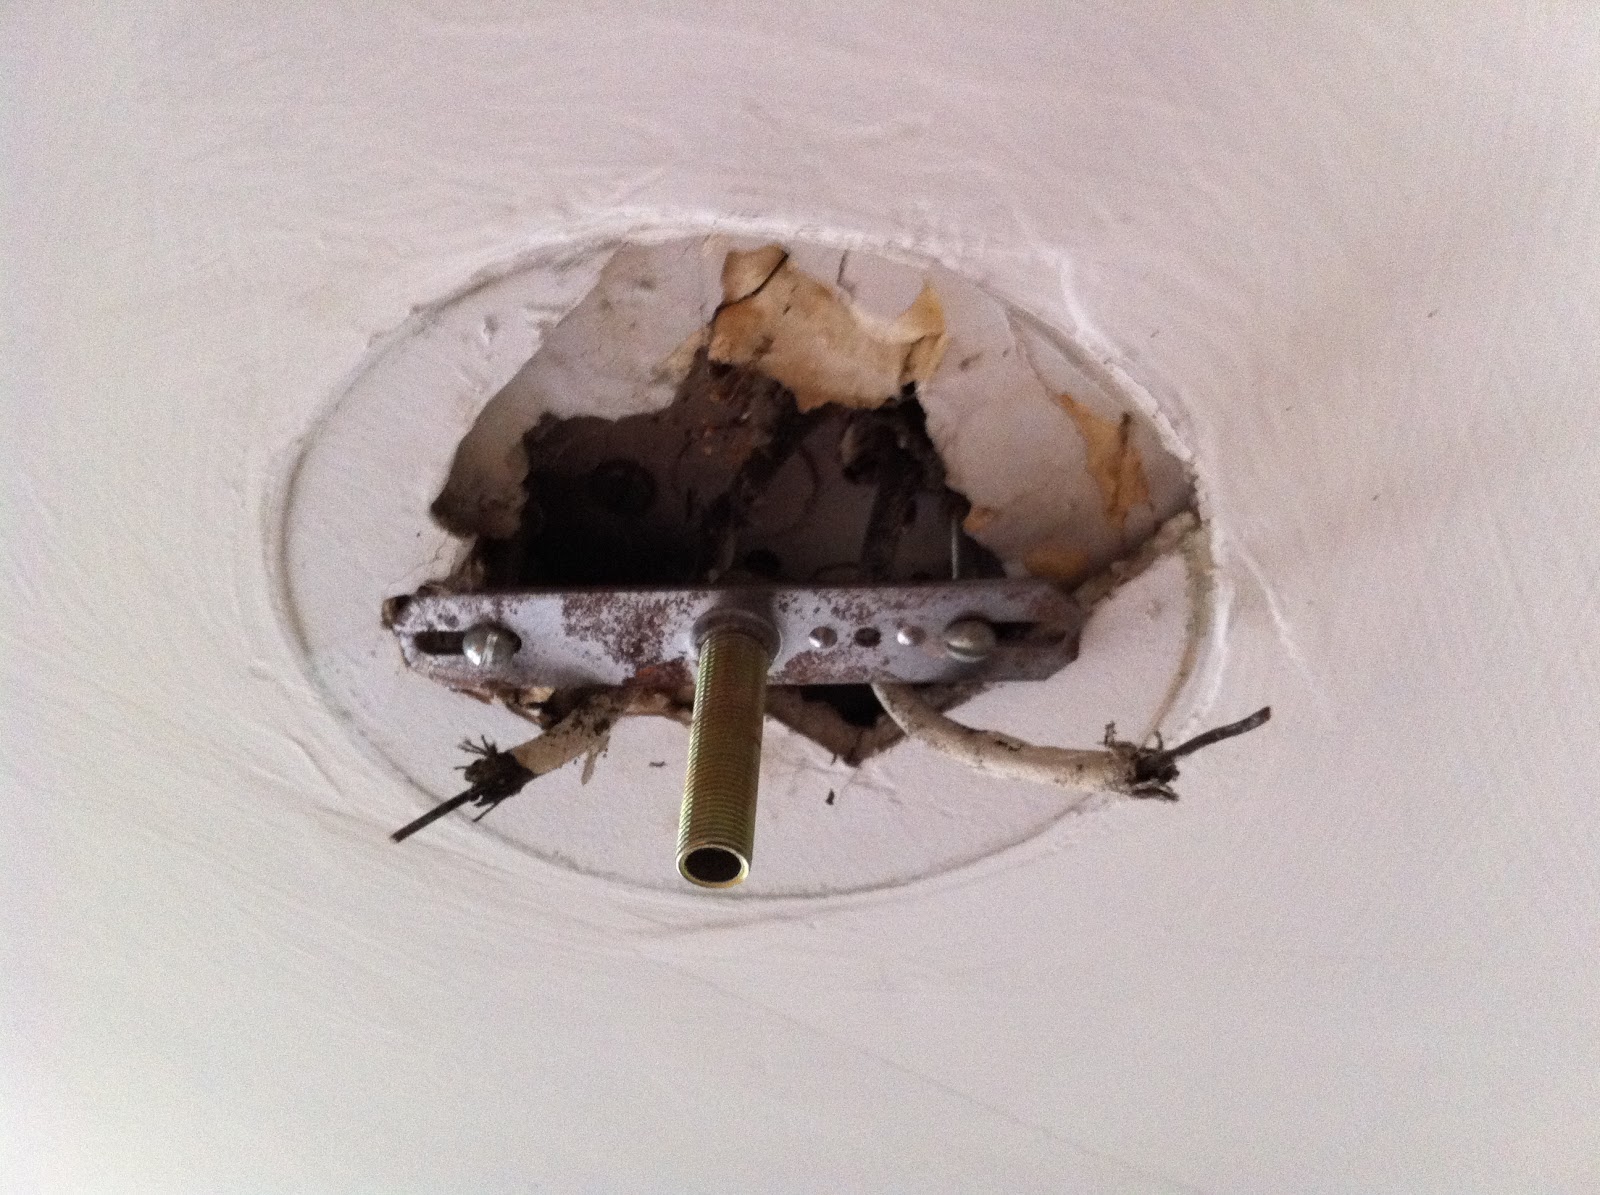
Next, we turned the power off, Seth removed the old chandelier (manly man doing manly man things@ This is to be encouraged! Grrrr, that is manly!) and revealed some ancient wiring. Dang. Should have known. These old places are full of surprises. Typically, you see two wires: a white wire and a black wire. But we had two white wires. Boo. What does this mean?
So we didn't know how to connect the wires on the chandelier to those in the ceiling (typically you connect white wires with white wires, and black ones with black ones). Off to Home Depot. My plan was to find someone who knew more than I did, and ask them for advice. I kind of hit the jackpot when I met an electrician who worked part-time ther. He advised me to buy a voltage tester.
So here's how it works: You pull the wires as far away as possible from each other so you can test them more easily, then turn the power back on and hold this little toy up to each cord. The switch leg (the black wire) should make the voltage tester light up and beep and stuff, because it's hot. Naturally, the other one that doesn't beep and light up is the white wire.
It took some adjustment to the sensitivity of the toy (too sensitive and it will light up within a foot of a cord, too little sensitivity and it won't light up at all) but eventually I was able to identify which one was which! Yoo-hoo!
 | |
| Voltage tester showing us which wire is which. |
So we took a time out and called someone. In that moment, I realized smart do-it-yourself projects means call-them-yourself projects. And you shouldn't be ashamed. It's worth a shot. But in the end know your limits and hedge your bets. You can cause more harm than good in these old places!
While I was at work, Seth asked the electrician to hang the chandelier 32 inches above the table. (I tried it at different heights and this seemed to look best.)

While he was there, he also installed a light in one of our closets (hallelujah!) so it was worth the trip for sure.
Ready for the full reveal?
Ba-BAM!

I'm so hackies it's done. (What? You don't know my secret language? Per Ruby, hackies = happy. This is how I talk, by the way).
Don't you think it's an improvement? Any progress in your neck of the woods? Or recent projects? Any experiences where do-it-yourself turned to dial-it-yourself? Or dealing with super-old buildings? Spill the beans!
Hugs,
Erin
***Update #1: I should have noted that other than those assembly instructions, my experience with Alluminare (the company I purchased our drum pendant from) was exceptional. From helping me to select the perfect shade of white via email, to working with me so I got the best deal (It went on sale while I was still waiting for the color samples to be delivered. By the time I was 100% sure about the color selection it would have been regular price. So they kindly processed my order with the sale price, but put it on hold so I could confirm the color choice when the samples came in. Yay!)
***Update #2: Apparently they are working on improved assembly instructions! The kind folks at Alluminare emailed me the following—and even tweeted about it.
“I just wanted to thank you for your lovely blog post and I am thrilled to see those beautiful photos!... Wanted to let you know that we're working on some assembly videos to help ameliorate the frustration involved with assembly, and to invite you to send me any details on what frustrated you and Seth the most if you wish to. I am respectful of your time, and I am sorry that we let you down in that regard... Thank you again. Your taste is impeccable and I am so happy that you came to us."
Great news all around! Happy customer here!

Erin your blog is fantastic! I found it looking for a "how to paint a chandelier" search. I look forward to reading more! Heather
ReplyDeleteSorry I didn't mean to make that anonymous!
ReplyDeleteThank you very much, Heather! Really appreciate your feedback! Good luck with that chandelier project!
ReplyDeleteWow, what a gratifying feeling it is to kick out an ugly light fixture from your home. Makes a gal sleep better at night. I bet you are having naughty dreams about your very pretty new pendant though, aren't you!
ReplyDeleteOk I tried to leave a comment before, but I don't see it anywhere....I'm sure this info is here somewhere, but you mind sharing where you got your dining room table. Thanks :) Darcy darcyrv@hotmail.com
ReplyDelete@ Tim and Darcy - It's the bjursta table from Ikea. I purchased it on Craigslist and just sold it on Craigslist (new post coming soon on that!).
ReplyDeleteA note about the color: It's called brown/black and it is really dark! That's actually one of the reasons I decided to let it go. It just looked really heavy. But it is awesome if you need an expandable table! And the lines are really simple and flexible (Hubs kind of wishes I hadn't replaced it, and I can't decide if I regret it or not!)
Hope that helps!
Erin
@Michelle - You are crazy! :) Love it. And love the pendant, yep!
ReplyDeleteOooh can't wait to see what you replaced it with. I've seen that table at Ikea and was a little afraid of how dark it was myself :/ I have a whole house here I'm trying to decorate. It's so overwhelming and I'm paralyzed by indecision...nothing new here - lol! Thank you for responding :)
ReplyDeletenew balance outlet
ReplyDeletehermes birkin bag
michael kors tote bags
birkenstock clogs
mcm bags
mbt outlet
hermes outlet
mac cosmetics outlet
prada outlet
adidas yeezy boost 350 v2
2017.6.12chenlixiang
ray ban
ReplyDeleteadidas nmd
nike outlet store online shopping
goyard handbags
stephen curry 5
calvin klein outlet
iniki
Love the new replacement. Thank you for sharing the progress!
ReplyDeletewebstagram
Only aspire to mention ones content can be as incredible. This clarity with your post is superb and that i may think you’re a guru for this issue. High-quality along with your concur permit me to to seize your current give to keep modified by using approaching blog post. Thanks a lot hundreds of along with you should go on the pleasurable get the job done.
ReplyDeleteIf you want to learn more about The Electric Blender, you can visit now