Monday, February 28, 2011

How to Paint a Chandelier - Antique Finish

This post is a tutorial for anyone who wants to create an antique finish on a chandelier (or anything else, really).  I didn't find many instructions with photos online, so hopefully this will help someone out there.

You may have read that we've been in serious need of a new light fixture in the bathroom.

We wanted something that coordinated with our chrome fixtures, added some glamor in our little-bitty bathroom, and had the depth of an authentically aged piece.  I purchased this steal for a mere 25 buckaroos (and it was listed on other sites for around $300... happy dance!).


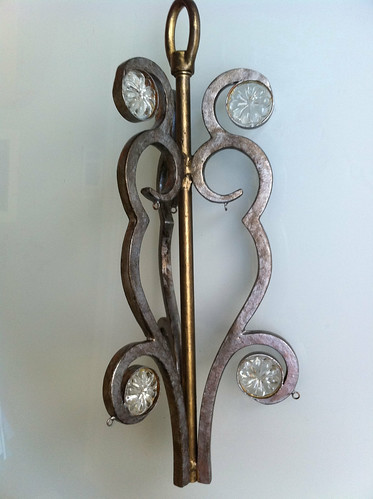
The crystals were beautiful and the metal was heavy and sturdy, but the finish was very different than the photo online.  Instead, it was a copper-y red finish... not bad, but it would that wouldn’t work in the bathroom.

So I decided to paint this sucker.  Fortunately, my darling mother-in-law has done this kind of thing more than once, so she held my hand at every step.  (And the bonus? It was fun!)

Supplies:
- Chandelier, or something to paint (umm, duh)
- Bronze paint (I used spray paint and painted by hand, but acrylic paint will work)
- Satin nickel / silver paint (Again, I used spray paint, but other paint would work)
- Gold paint (I used a “Gold Metallic Surfacer” that came in a 3-pack with other paints)
- Dark bronze paint  (I used a “Blackened Bronze Metallic Surfacer”, part of said 3-pack)
- Various paint brushes
- Paper towels
- Plastic dishes (to hold your paint)


Supplies to paint a chandelier

Prep
If your chandelier is already assembled, remove the crystals. Use painter’s tape on any glass areas you can’t remove.
Prepping the chandelier for painting.
By the way, see how red the color is?

Step 0 (meaning not always necessary): Paint dark bronze. 
If your chandelier is a really light color, laying a dark base will help to create create a layered, aged look, but in all honesty we probably could have skipped this step since our copper chandelier was dark enough already.

My sweet hubby was running errands while I was chained to a desk at work, so I asked him to pick up some supplies. Since hubs couldn’t find any bronze acrylic paint (and was dying to leave the craft store) he picked up the oil-based spray paint. I sprayed it into a dish, and applied with a small paint brush. But if you can find acrylic paint, I say use it. It’s easier to clean up after all.

Another note: It wouldn’t hurt to use a darker color (oil-rubbed bronze) than I did (bronze).


Step 1: Paint the chandelier your color of choice (gold and silver, in this case)
We decided to paint this chandelier in both gold and silver with a small brush.

Here it is after painting the satin nickel. Notice how some of the bronze paint is showing through just a bit?  That's just fine.
After painting with silver nickel (by hand)

And after the gold:


Step 2: Use blackened bronze paint to create antique finish. 
This step is where the magic happens. And remember (advice from my reassuring MIL) if it doesn’t turn out perfectly, you can just paint on top of your mess-up with gold or silver and start over again.  No big deal!  :)  So try not to be nervous.

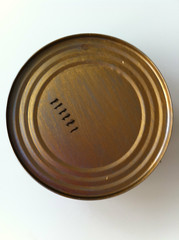
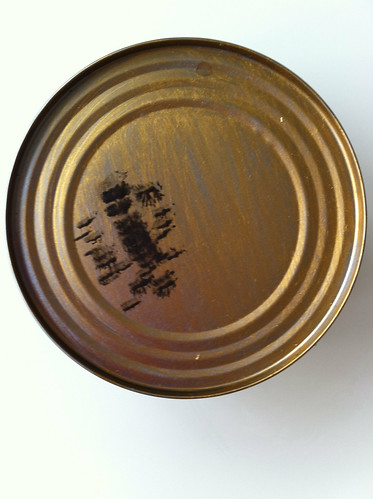
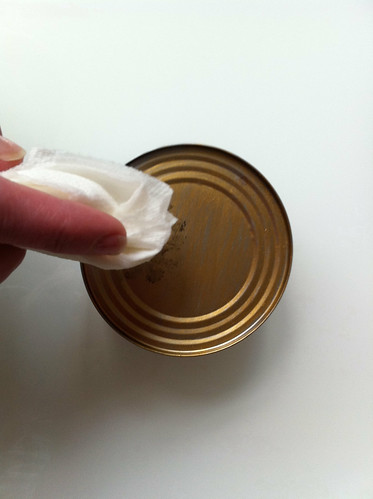
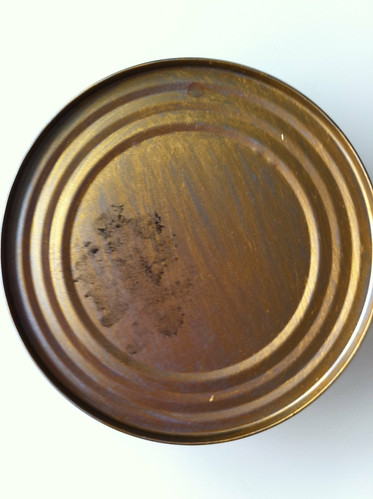
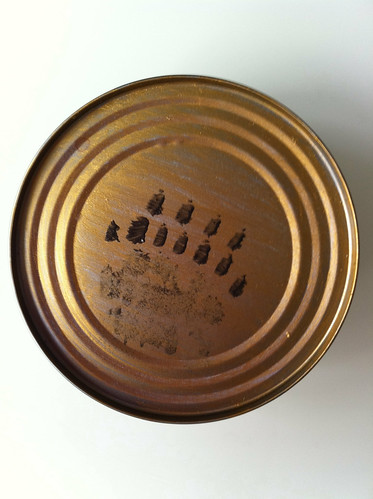
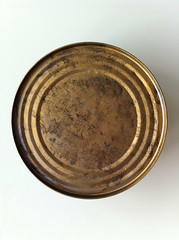
We tested a few techniques on the top of a soup can first.  Here’s the technique that worked best for us (also demonstrated on the top of a can):

2.1  Paint stipples/dots of the blackened bronze paint.  Use your brush to paint little dots in one area.  Side note: our paint was actually called a "blackened bronze metallic surfacer".  Also notice that that we weren’t using oil paint for the bronze paint since it wouldn’t play well with the water on the paper towel. 

Can 2
Can 3

2.2  Blot the area with a damp paper towel.

 Can 4

Can 5

Keep working in sections
Can 6 adding more paint

Can 7 done!


The bronze doesn’t have to be evenly distributed.  In fact, it shouldn’t be.  We actually went back and added some random darker spots, which really helped to achieve the aged look we’re after.

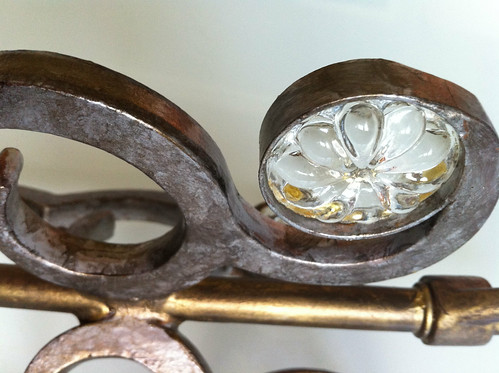
2.3  Use bronze fill any crevices and wipe off the surrounding area with a damp paper towel, leaving the gaps filled with dark paint.  We added a little bit of water to ours for this step, but depending on the consistency of your paint water may not be necessary.


Use watered-down bronze paint on any crevices and wipe off with a damp paper towel (leaving the gaps filled with dark paint). 
A couple more shots:

Chandelier after1

Chandelier after 2 close up


"After" photos of the chandelier hung are coming soon! Thanks again to my MIL for everything.

Has anyone else tried painting a chandelier or creating an antique finish?  What techniques did you find helpful?

You may also like:
It's Up! - Chandelier in the Bathroom

Friday, February 25, 2011

Industrial chic? (Light in the bathroom)

About two years ago I moved in to our place, pushed things around, fretted over all the things I would DIE to change (still doing that, by the way) and rolled my sleeves up on a project or two.

One of the first endeavors was removing a glass-light-thingy from the bathroom ceiling fixture.  I don't have a "before" shot.  Just trust me.  It was ugly.  And I figured (a) it couldn't be any uglier if I removed it (b) by removing the glass-thingy I was forcing myself to actually upgrade really soon, and (c) maybe in the meantime it could pass as "industrial chic".

But here's the thing:  It ain't chic.  It's a light bulb.


And like so many other things, our eyes got used to it. The bare light bulb just sat there.

But gosh-darn, it's time to make some changes around here.

I considered several options:
-  Simple flush-mount ceiling light? It would do the job.  It would be cheap.  But it would also be boring.


-  How about a truly industrial light -- like these from West Elm?
West Elm Globe Pendant
West Elm Cluster Glass Pendant

 - Or push the envelope for our little bathroom, and install a plush chandelier?
Image via Apartment Therapy
I think the chandelier wins. Our tiny bathroom can use the glam, and I can only imagine how hard it would be to keep the globe fixtures clean with all the hairspray flying around. I like hairspray, after all.

I'll share the plans for one I purchased (including a new paint job) soon!

Wednesday, February 23, 2011

Shower curtain #2... Someone's in the dog house

Remember the "sneak peek" of the new shower curtain last week?  Here she is in all her glory.

via Urban Outfitters

But that's not what she looks like in our bathroom.

We obviously had to take it down to re-tile the wall, so I carefully placed it on the guest bedroom bed, which happens to be beside George's (our bulldog's) kennel. You know where this is going. Somehow he managed to pull some pretty little ruffles into the kennel during Seth's grouting disaster of 2011.


Meet George. So sweet when he's sleeping.
This dog is like Houdini.  He's managed to pull our doxie's bed from inside her kennel to inside his kennel on more than one occasion.  It defies reason, and really freaks her out. And just last night he pulled a quarter from behind my ear. Skillz, right?

Anyhow, here's the damage. I'm totally taking this out of George's allowance. 


I only had it for two weeks!

What next?
May as well try something new this time around. Since our walls are super-dark gray, I ordered a new light gray shower curtain. It might help break up the monotony of white tile that's ev-er-y-where. On the other hand, I really liked the clean white ruffles, so I also ordered that one again.

Guys, I'm kind of torn between the two colors (sorry, couldn't help myself!). What do you think?

Related Posts:

Monday, February 21, 2011

You are my sunburst, my only sunburst (new mirror)

I had one of the coolest (yes, I say "coolest") lunch breaks last week.  Instead of walking the pooches, I picked up my new gold sunburst mirror.


It's about 3-feet in diameter with sharp metal tips, so carrying it out of the store and loading it into (and out of) the trunk was not and easy or graceful task.  I'm fairly sure I heard some snickering at one point, but what-evs.


Fun-day Monday fact: The mirror below is $375 at Tonic Home ($436 with shipping). I'm 95% sure it's the exact same one.  Maybe even 96% sure.  I did not pay $375.  This make me happy.


Here it is on the cover of House Beautiful:

Image via Tonic Home
Image via Tonic Home.

Ya'll, it is so pretty ya'll. (channeling Paula Dean's precious voice)

Friday, February 18, 2011

Bathroom progress - Retiling shower wall, Part 2

After Seth demoed the tile wall, we bagged all the rubbish that was sitting in the tub (which we had lined with  drop cloth to prevent the drain from clogging) and took it outside.  

Removing the wire mesh
That wire was not easy to remove.  Not to worry if you're retiling a fairly new home... apparently this was the old-school method (pre-1960's or so, I believe).


Wire mesh behind the tile wall... stinks to remove.
This photo was taken right before we removed
the wood piece right along the tub.

After removing the remaining wood along the tub with a pry bar (apparently an incomplete update by former owners?), my dad used a circular saw with a masonry blade to cut the remaining wire and make a nice, clean line with any remaining plaster on the area at the top.

We left that particular area along the trim because it was very secure and if we removed it, we might have to remove the trim around the shower.  I'm not exaggerating in the slightest when I say it looked like a bomb went off. I nearly fell apart thinking about how I would be cleaning it up for weeks as the dust slowly fell, but instead closed the door had a private cleaning freak-out with my dust pan.

Installing concrete backer board
Next, we cut two pieces of concrete backer board to size, and screwed 'em in.  Here's my dad in action:

Installing concrete backer board
Side note: His butt was on billboards for blue jeans once.  No lie.

Moving on...

Applying the tile
After applying the tile adhesive with a trowel in a small area, we pressed each tile firmly into place, starting at the bottom left and working across.  You might notice from the photos that we didn't have to use spacers because our 4 x 4 ceramic tiles had spacers included.

We took special care to line the tiles up with the other two walls. It which wasn't super-easy (and called for several adjustments) but it really helped to keep the new wall from looking different from the rest.  If you tackle a project like this yourself, don't get discouraged if it takes awhile to put first few rows of tile.  The pace will pick up about 1/3 of the way through because you already have the first few rows set as guides.

We used a tile cutter for the corner and top tiles (about $20 at a hardware store). Make sure to grab some extras because butterfingers here broke quite a few.

Finally, at about 10:00, they were all on the wall!


Grouting the tile
After letting things sit for 24 hours, it was time to grout.  (In the meantime, we took baths, watched church live streaming, and were very careful to keep any water from getting on the walls... knew you would ask.)

Make sure you wear latex gloves when applying the grout, or you'll wash some skin off your hands along with the grout.

Seth started on Monday while I was at work.  I got a call.  He was frantic.  The directions said to wait 10-20 minutes after grouting, then wipe off with the surface a sponge.  So he grouted the entire wall and waited about 20 minutes.  But it wasn't coming off.  Then he screamed something about it getting harder with each passing second and hung up.

There's a reason I'm telling you this, other than to share the turmoil I put my husband through by signing us up for this project.  Don't wait too long to wipe the grout off your tile! Wipe the area off with a damp sponge as you work in sections (instead of waiting to finish the entire wall).

As we say in the south "bless his heart".  After an hour and a half of painful scraping, most of it had come off the tile.  I'm so proud.


Done!  Thousands saved.  Here's a finished shot (and a little peak at our new shower curtain).


Last, I grouted in the corners and filled them in really well--pushing the grout as far back as possible to make sure it was thoroughly sealed, and smoothing with my finger.  I also grouted the two surrounding walls, which made a tremendous difference in making it all of the walls look like they were installed at the same time. You really can't tell they're different!

Anyone else tried tiling a bathroom yourselves?  Similar horror stories to share?

Wednesday, February 16, 2011

Bathroom progress - Retiling shower wall, Part 1

While rub-a-dub-dubbin a few weeks back I noticed some of the tiles in the shower were coming up on the bottom. It didn't really concern me at first. They were pulling back from the wall, but on an even line. This place is an oldie (built in 1920 or thereabout) so I chalked it up to another weird thing about the old bag.

But it continued, so I did what I always do in times like these: called my dad. He said it sounded like some major work needed to be done. I snapped some pics on my phone and sent them over so he could get a better idea (hoping, of course, he would call back telling me how EASY it would be after all).


He called back.  The entire tile wall was going to have to be replaced.  That could cost thousands.  (*Head BANGING against the wall*) Thousands?!

But once again, Dad came to the rescue: "We can do it ourselves." (*Ridiculous happy dance, complete with some pelvic thrusts, the hand jive and disco dancing with my dachshund*)

Ya see, my  daddy-o single handedly renovated a very old house in Mountain Brook before he and my mom were married, so he's super-savvy with handy-man-ed-ness. 

Back to the details of our project... The surrounding walls were fine, so just one wall had to be replaced.  Good, right?  But that brought its own set of challenges and questions: Could we demo the tile on just one wall without damaging the other walls?  Could I find new tile that matched the old stuff?

For awhile (meaning 24 hours--we had to move super-fast to make sure water would stay off the wood behind the tile) I considered creating a gorgeous tile accent wall.  If we were going to do this ourselves we may as well make it amazing, right?  But I have this quirk.  I can't stand it when my shower curtain is open.  Meaning we would be shelling out a few-hundred extras for pretty tile that only me, my husband, and our rubber ducky would see.

Long story short, I found tile that was a close enough match.  We got the supplies and Seth started demolition one Friday afternoon.  Check it:


See all that metal wire?  Apparently it's what they used pre-1960's instead of concrete backer board. Tis not easy to rip out, my friends.  I know because Seth told me at least 50 times (an hour).

But look how macho he is! Here was the progress after Saturday morning:


Exciting to know that the worst part was over, but scary to know we would be isolating our dirty selves for the entire weekend.  Did I mention we only have one shower?

Monday, February 14, 2011

Bathroom needs a makeover

Until about a month ago, we hadn't made made much progress in the bathroom since the day we moved in.  Sure, we painted the ugly (u-g-l-y) yellow walls lime green. It was not good... too yellow. (But I still love you, lime green. I'll rock out again some day.) So we recently painted them deep gray: Benjamin Moore's "Rugged Suede". Nice.

And yet, we have miles to go my love.

Let me preface this by saying I don't hate the shower curtain.  I like the shower curtain.  I don't hate the art.  I like the art.  But we're shakin' things up in these parts and the accessories don't work with our new gray walls.

Enough hee-hawing.  I reveal our bathroom work-in-progress.

Next to address:
- shower curtain
- shower curtain rod
- ceiling light fixture
- art behind toilet
- medicine cabinet (?)
- linens (it sounds better than saying "towel beside the sink")

I've actually made some progress in the last month or so, and will share new pics this week! Plenty of surprises.